SwiftUI Accessibility (Part 2)
In this article we are going to pick up where we left off in the first part. If you missed it please check out SwiftUI Accessibility (Part 1)
If you are curious, you can also take a look a the code implementation.
Voice Over
Apple has an extensive documentation on this topic. A couple important takeaways are:
- Provide good localized accessibility labels. Descriptions should be relevant and as concise as possible
- Pay special attention to custom UI components and set correct accessibility traits.
- Group elements if it makes sense to improve navigation. The goal is that the user is able to navigate in the correct order and reach the element he is looking for as fast as possible.
- Ignore elements that are not relevant for the user
With this in mind let's take a look at our use case.

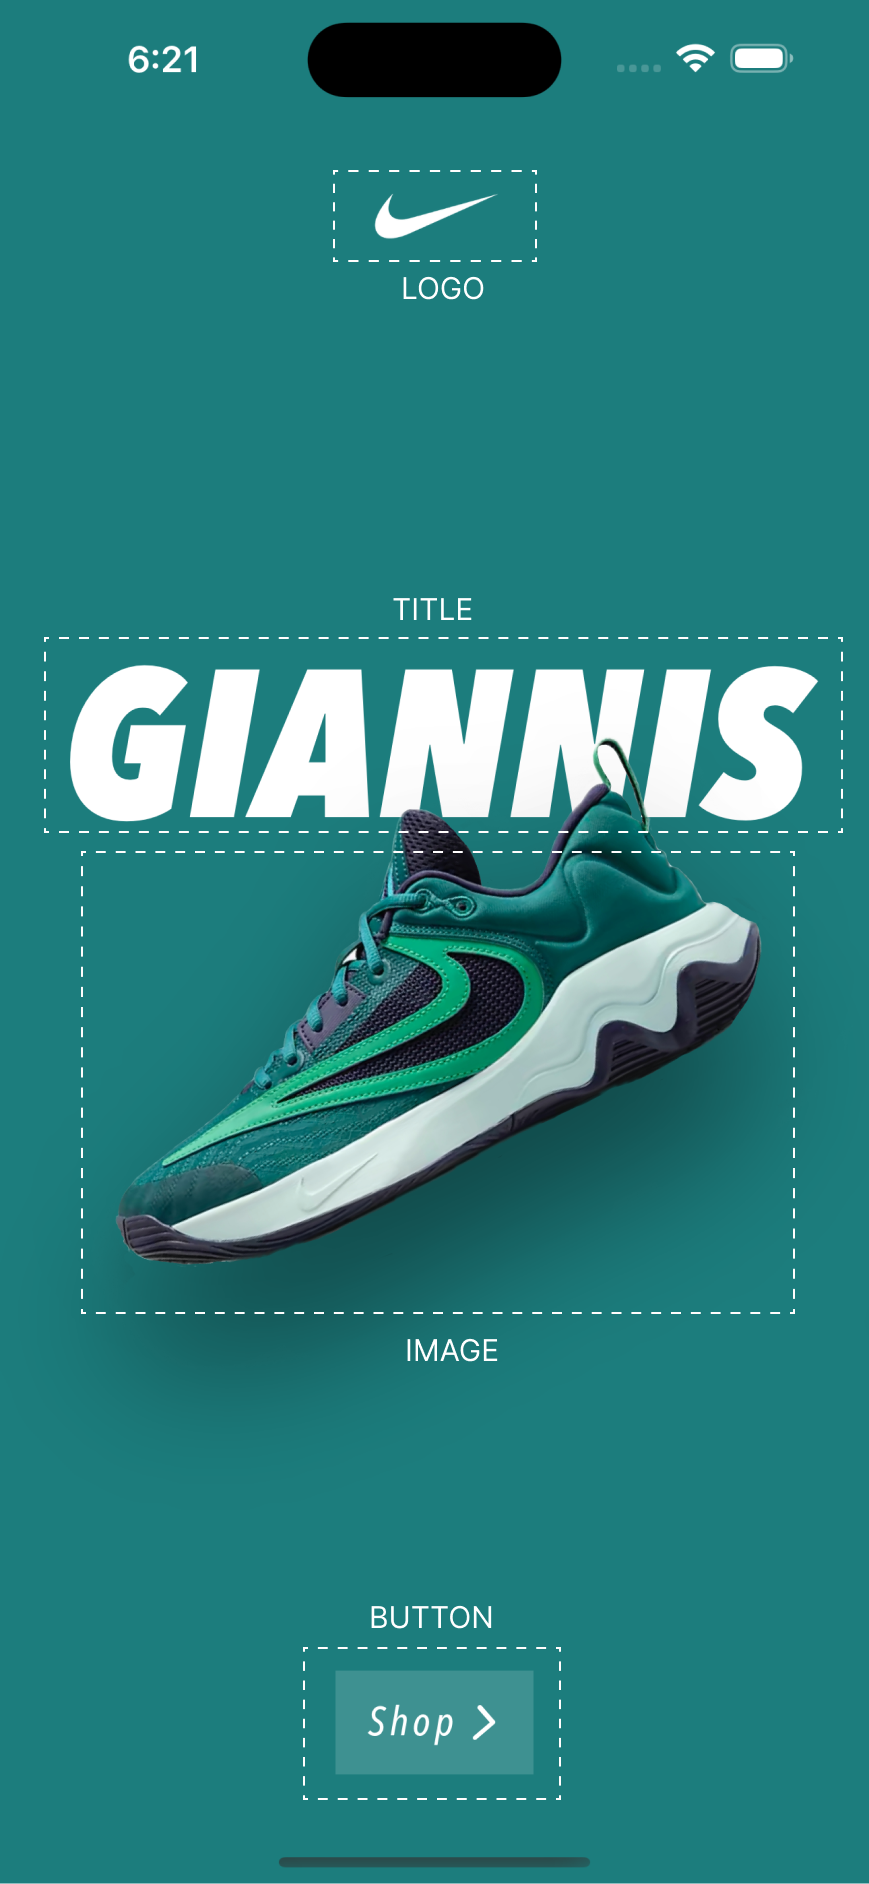
We have an horizontal slider, and in each slide we have:
- the logo
- the title text
- the image
- the CTA button
The logo can be ignored and the rest of elements can be combined. As we only have one possible action we can treat every slide as if it was just a Button. There are multiple ways we can solve this. One way is to replace the entire slide using accessibilityRepresentation and provide an alternative accessibility representation.
var body: some View {
	GeometryReader { reader in
		ZStack {
		// view content
		}
     }
     .accessibilityRepresentation {
		Button(action: {
            goToShop()
        }, label: {
            Text("Sneakers slider" )
        })
     }
}
Next we add an accessibilityValue with the current visible title
Button(action: {
	goToShop()
}, label: {
	Text("Sneakers slider" )
})
.accessibilityValue("\(sneakers[selectedIndex].title), Shop")
Note: Remember that all this labels and values need to be localized
Last but not least we are going to provide a convenient way of navigating between slides. For that we are going to use the accessibilityAdjustableAction modifier and move between slides when we increment or decrement.
Button(action: {
	goToShop()
}, label: {
	Text("Sneakers slider" )
})
.accessibilityValue("\(sneakers[selectedIndex].title), Shop")
.accessibilityAdjustableAction { direction in
	switch direction {
	case .increment:
		guard selectedIndex < (sneakers.count - 1) else { break }
		scrollToNext()
	case .decrement:
		guard selectedIndex > 0 else { break }
		scrollToPrevious()
	@unknown default:
		break
	}
}
With all this in place the user is able to navigate between slides and activate the "go to shop" action in each slide. To test it, and see if this really works as intended, run it on a real device activating Accessibility/VoiceOver.
Reduce Motion
This is another interesting accessibility feature. It's especially relevant in cases like ours where by default a lot of animations are being triggered.
Our main focus will be the title view where letters are continuously sliding in and out while the user scrolls horizontally.
Note: Reduce Motion doesn't mean that all animations should be removed. If an animation is too prominent we replace it by another that is more calm. A bouncy slide-in animation for example, can be replaced by a simple fade-in animation.
First we read the environment value:
@Environment(\.accessibilityReduceMotion) var reduceMotion
And then depending on this value we adjust the transition
Text(verbatim: "\(letter.uppercased())")
	.transition(reduceMotion ? .opacity : transition(isMovingLeft))
Straight forward. This way instead of sliding in/out, the letters just fade in/out. On top of this, we also adjust the code so that when reduce motion is enabled, the entire title fades in/out and not letter by letter.
As you can see, making your app accessible is not hard but it requires time and care. There are a lot of common patterns, but you need to tailor your solution to your specific use case.
In this two part series we have gone through several accessibility improvements, but there are a lot more we have not mentioned: isOnOffSwitchLabelsEnabled, accessibilityDifferentiateWithoutColor, accessibilityReduceTransparency, colorSchemeContrast,...
If you are not used to it, it might seem overwhelming at first, but take your time and analyse what makes sense for your app.
Accessibility is an important topic to keep in mind from the start, even before typing any line of code. Doing it this way, the process will be much easier and faster.